The carpenter's square block is very old and very traditional. But weirdly, when I went looking for patterns or tutorials, I found nothing I could easily use. I ended up drafting Emma's quilt on my own, with graph paper.
For the May BMQG block of the month, I reworked this same block into a smaller-form example, with 2 'woven' colors. This tutorial creates a 9" (finished) block.
One warning: PAY ATTENTION to the direction of the sub-units as you piece! I have made over 20 of these blocks in the past 6 months and still had to rip out several of these seams, after I got distracted!
Cutting directions:
From the white (background) fabric, cut the following pieces:
A - 1.5" x 1.5" (cut 7)
B - 1.5" x 2.5" (cut 4)
C - 1.5" x 3" (cut 2)
D - 1.5" x 3.5" (cut 2)
E - 3" x 3.5" (cut 2)
From the navy fabric, cut the following:
A - 1.5" x 1.5" (cut 2)
B - 1.5" x 2.5" (cut 2)
C - 1.5" x 3" (cut 1)
C - 1.5" x 3" (cut 1)
D - 1.5" x 3.5" (cut 3)
F - 1.5" x 5.5" (cut 1)
From the red fabric, cut the following:
A - 1.5" x 1.5" (cut 2)
B - 1.5" x 2.5" (cut 2)
C - 1.5" x 3" (cut 1)
C - 1.5" x 3" (cut 1)
D - 1.5" x 3.5" (cut 3)
F - 1.5" x 5.5" (cut 1)
Assembly steps:
1) First, attach one red A and one navy A to opposing sides of a white A:
2) Keeping red A to the left, add a red D to the top and a navy D to the bottom of the unit from Step 1. Set aside.
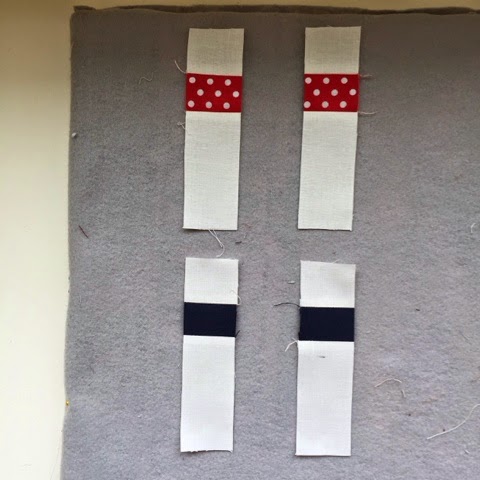
3) Now attach one white B to either side of a red B. Repeat with a navy B, giving you the following two units:
4) Attach a red D to the navy unit from step 3. Attach a navy D to the red unit from step 3. You'll have the following:
5) Attach the units from step 4 to the top and bottom of the central unit from step 2, as illustrated below. Take care to double-check the direction of the units before you piece! Set aside.
6) Attach one white A to a red B. Do the same for a navy B.
7) Attach a white D to each of the units from step 6. Take care to do this as shown, as the direction does matter:
At this point, we have the following:
8) Attach two white As to opposite sides of a navy A. Do the same for a red A. Then attach a D of the opposite color to each unit. You'll have two units that look like the following image. Set aside.
9) Assemble the two units pictured below by first sandwiching the navy C between a white C and white E. Do the same for the red C:
10) cut the two units from step 9 in half lengthwise, to give you the following:
11) Between each of the pairs from step 10, attach an F of the opposite color. When you're done, you'll have the following:
12) Attach one unit from step 7, step 8, and step 11. Be careful you arrange as shown here:
13) Carefully attach the remaining units from step 7, step 8, and step 11, exactly as shown here:
14) Attach the finished strips from steps 5, 12, and 13 to complete the block:
Enjoy, and let me know how you do. (Members: please be sure to post any blocks you make to the BMQG BOM flickr page!)


